Posted by: yegorich | March 30, 2017

Buildroot: mount another rootfs from within initramfs

Sometimes it is needed to start an initramfs, perform some actions (system update for example) and then mount your target rootfs. The util-linux package provides special utility switch_root, that simplifies the root changing process. There are at least two flavors of switch_root: one from the util-linux package and a busybox variant. I’ll show the difference later.

The most important part in this case is, that switch_root must be executed with PID 1, hence it must be run within /init script.

Create an initramfs image in Buildroot. Your default output/target/init will look like this:

#!/bin/sh
# devtmpfs does not get automounted for initramfs
/bin/mount -t devtmpfs devtmpfs /dev
exec 0</dev/console
exec 1>/dev/console
exec 2>/dev/console
exec /sbin/init $*

In our use case we will mount a rootfs stored in NAND in a UBIFS partition. So our script for busybox switch_root will look like this:

#!/bin/sh
# devtmpfs does not get automounted for initramfs
export PATH=/bin:/sbin:/usr/bin:/usr/sbin
/bin/mount -t devtmpfs devtmpfs /dev
mount -t proc none /proc
mount -t sysfs none /sys
exec 0</dev/console
exec 1>/dev/console
exec 2>/dev/console
ubiattach -p /dev/mtd5
mount -t ubifs ubi0:rootfs /mnt
cd /mnt
mount --move /sys /mnt/sys
mount --move /proc /mnt/proc
mount --move /dev /mnt/dev
exec switch_root -c /dev/console /mnt sbin/init

If you prefer to use util-linux switch_root, your script will be simpler because this switch_root flavor will take care of /dev, /proc and /sys itself:

#!/bin/sh
# devtmpfs does not get automounted for initramfs
export PATH=/bin:/sbin:/usr/bin:/usr/sbin
/bin/mount -t devtmpfs devtmpfs /dev
mount -t proc none /proc
mount -t sysfs none /sys
exec 0</dev/console
exec 1>/dev/console
exec 2>/dev/console
ubiattach -p /dev/mtd5
mount -t ubifs ubi0:rootfs /mnt
cd /mnt
exec switch_root /mnt sbin/init
Posted by: yegorich | March 4, 2016

Linux: managing kernel modules from C code

I was searching for the way to load/unload kernel modules from my C code and stumbled upon libkmod. See example below:

#include <stdio.h>
#include <libkmod.h>

int main(int argc, char **argv)
{
        int rc;
        struct kmod_ctx *my_ctx = NULL;
        struct kmod_module *my_module = NULL;

        my_ctx = kmod_new(NULL, NULL);
        if (my_ctx == NULL) {
                perror("kmod_new");
        }

        rc = kmod_module_new_from_name(my_ctx, "musb_dsps", &my_module);
        printf("rc %d\n");

        if (kmod_module_remove_module (my_module, 0)) {
                perror("rmmod ");
        }

        sleep(1);

        if (kmod_module_insert_module(my_module, 0, NULL)) {
                perror("insmod ");
        }
        return 0;
}
Posted by: yegorich | January 23, 2014

Automatically Bring Up SLCAN Device Via Udev

SocketCAN supports SLCAN to work with serial to CAN converters speaking ASCII protocol. In order to use such device, you need a special daemon from can-utils, called slcand. So the normal procedure looks as follows (these tests were made with VScom USB-CAN adapter):

1. find, what tty name the adapter got using for example dmesg (in our case it is /dev/ttyUSB0)
2. start slcand as super user: slcand -o -s8 -t hw -S 3000000 ttyUSB0

If you execute “ip addr” now, you’ll see slcan0 in the list of available devices.

These steps could be automated, so that you won’t need to care about devices names, calling daemon etc.

Create following udev rule /etc/udev/rules.d/90-slcan.rules:

# CAN
KERNEL=="ttyUSB?", ATTRS{interface}=="USB-CAN*", ACTION=="add", RUN+="/usr/local/bin/slcan.sh"

And then create following script /usr/local/bin/slcan.sh:

#!/bin/sh

echo $DEVNAME &gt;&gt; /tmp/udev-can.txt

if [ -z "$DEVNAME" ]; then
        exit 1
fi

slcand -o -s8 -t hw -S 3000000 $DEVNAME

You’re done. Now as soon as you attach your CAN adapter, you’ll get slcan0 device working at 1Mbit/s (-s8).

Posted by: yegorich | October 31, 2013

OpenWrt: Creating a Package Containing Only Files

This tutorial describes how to write OpenWrt packages. Most packages have to be built from source. This blog post shows some hints about creating a package containing only files like for example scripts. So far I had tree issues:

  1. With standard template OpenWrt called make trying to compile the package and failed as there was no Makefile in the package.
  2. During the installation part OpenWrt tried to invoke make as make install too.
  3. As scripts were not part of the compilation process they don’t reside in PKG_INSTALL_DIR.

The first issue can be solved via empty Build/Compile section:


define Build/Compile
endef

The second issue can be solved via removing PKG_INSTALL:=1.

To install files use PKG_BUILD_DIR macro.


include $(TOPDIR)/rules.mk

PKG_NAME:=foo

.......

include $(INCLUDE_DIR)/package.mk

define Package/foo
SECTION:=utils
CATEGORY:=Utilities
TITLE:=Foo scripts
URL:=www.mypage.com
endef

define Package/foo/description
Foo scripts description
endef

define Build/Compile
endef

define Package/foo/install
$(INSTALL_DIR) $(1)/sbin
$(CP) $(PKG_BUILD_DIR)/bar $(1)/sbin/
endef
$(eval $(call BuildPackage,foo))

Posted by: yegorich | May 22, 2012

SocketCAN Support in Python

Since version 3.3 Python provides support for SocketCAN. You can specify AF_CAN protocol family as you do in C. Below you’ll find slightly modified example provided in the original SocketCAN patch.

To get started just copy the code into example.py and start it as follows provided your CAN interface is can0:

python3 example.py can0

Use build_can_frame() and dissect_can_frame() to build/dissect CAN frames. Interface management like bitrate settings or getting statistics will be made as usual via iproute2 utility.

import socket
import struct
import sys

# CAN frame packing/unpacking (see `struct can_frame` in <linux/can.h>)
can_frame_fmt = "=IB3x8s"

def build_can_frame(can_id, data):
        can_dlc = len(data)
        data = data.ljust(8, b'\x00')
        return struct.pack(can_frame_fmt, can_id, can_dlc, data)

def dissect_can_frame(frame):
        can_id, can_dlc, data = struct.unpack(can_frame_fmt, frame)
        return (can_id, can_dlc, data[:can_dlc])

if len(sys.argv) != 2:
        print('Provide CAN device name (can0, slcan0 etc.)')
        sys.exit(0)

# create a raw socket and bind it to the given CAN interface
s = socket.socket(socket.AF_CAN, socket.SOCK_RAW, socket.CAN_RAW)
s.bind((sys.argv[1],))

while True:
        cf, addr = s.recvfrom(16)

        print('Received: can_id=%x, can_dlc=%x, data=%s' % dissect_can_frame(cf))

        try:
                s.send(cf)
        except socket.error:
                print('Error sending CAN frame')

        try:
                s.send(build_can_frame(0x01, b'\x01\x02\x03'))
        except socket.error:
                print('Error sending CAN frame')

As alternative you can use python-can module, that can handle both Python 2 and 3 and you can also use it under MS Windows OS.

Posted by: yegorich | May 7, 2012

Capturing and Analyzing CAN Frames with Wireshark

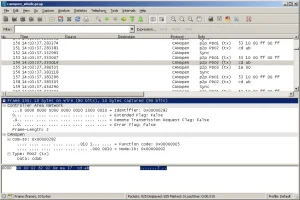
Wireshark is a well-known network packet sniffer. Since 2009 it is also capable of capturing CAN frames via SocketCAN interface in Linux. Just configure and activate your CAN interface and it will show up as one of the available sniffing interfaces. The image below shows CAN frames captured via USB-CAN adapter (slcan driver).

Following information will be extracted from CAN frame:

  • Identifier
  • Extended Flag
  • Remote Transmission Request Flag
  • Error Flag

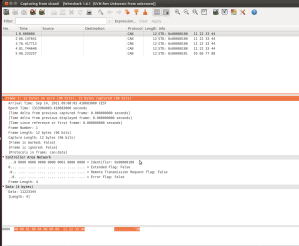
As of Wireshark version 1.7.1 CANopen dissector was introduced. See image below.

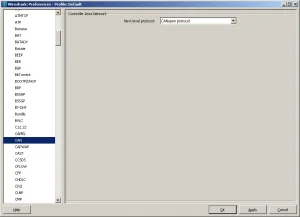
As CAN has no ports or other remarkable protocol options you’ll have to manually choose, how CAN frames should be interpreted.

And the last note. Though CAN frames can be captured only in Linux, they still can be analyzed on every system Wireshark is running on.

Posted by: yegorich | March 27, 2012

Controller Area Network (CAN) support in Android

Since version 2.6.25 Linux kernel has a special networking stack for CAN communications – SocketCAN. There exist many drivers for various CAN devices in the kernel: PCI/USB cards, SoC integrated CAN interfaces etc. Thus writing a CAN software is not a problem on modern Linux systems, because you have a unified interface to talk to different CAN hardware. Due to SocketCAN support in Wireshark you can sniff and analyze CAN communication without a need for expensive proprietary software.

But what about Android? With versions 3 Android is able to work better with bigger screens, hence it is suitable to run on industrial Panel PCs  (whether x86 or ARM based). CAN support can be divided into two levels:

  • system layer (SocketCAN interface configuration and administration)
  • application layer (Java API to send/receive CAN frames and getting network statistics)

To the first case belong such tools as ip from iproute2 and can-utils. Unfortunately Android’s ip won’t function out-of-the-box due to some compiler optimizations that interfere with dynamic routines usage in ip. For more detail refer to this patch, that fixes this issue. So with working ip CAN interfaces can be configured (bitrate, sample point etc.) and brought up and down.

can-utils package provides tools to send/receive CAN frames and some other stuff like server for serial link based CAN devices. This package won’t get compiled in Android because of missing kernel headers (linux/can.h etc.). This patch adds required header files and also adds AF_CAN protocol family to Bionic library. can-utils already has Android.mk, so it can be added to external packages without any change.

I could find no production ready solution for the application layer. The most desirable solution would be native support for SocketCAN like in Python 3.3 (see this bug report). As alternative Kayak project provides socketcand server and Java classes that communicate via TCP with socketcand, hence OS independent. But both Kayak classes as also socketcand will have to be adopted due to some Android API limitations.

Basic issues seem to be solved and the road to bring full CAN support to Android is open. I’m looking forward to see new projects appearing in this area. Let me know if I’ve missed something related.

Posted by: yegorich | December 27, 2011

Managing patch series with git

Since I’m involved in Buildroot development, I have to send patch series to BR mailings-list frequently. Quilt was my friend for all this time. But the whole procedure has some disadvantages like using e-mail client and defining subject string etc.

Git provides very flexible environment with format-patch and send-email commands. With the first one you can specify which commits should exported as patches.

git format-patch origin/master

will extract all commits since the last push. If you just want to extract only 2 latest commits of your 5 commits execute:

git format-patch -2

If you’re sending reworked patches, it is important to show the version of this patch set. This can be done with –subject-prefix.

git format-patch --subject-prefix="PATCH v2" origin

will add [PATCH v2 x/y] before your real subject.

The patches will be sent via git send-email command, where you can specify what patches should be sent to whom.

git send-email –to=dev@list.org –cc=maintainer@list.org 0001-foo.patch

With –compose switch you can add a summary to the whole path set.

The above commands let you format and send the finished patches. But how to rework the patch in the middle or the whole patch set? The answer is git rebase. With git rebase -i origin/master you can interactively mark the patches to change or change the order of patches etc. Please refer to this section of “Git Community Book” for further details about git rebase.

Happy gitting 😉

Posted by: yegorich | September 28, 2011

Writing LAN test with Python

I was told to make a LAN test. As I was playing with Python anyway and wanted one test for both Linux and Windows, I decided to give it a try.

The test is working as follows. Two LAN interfaces will be connected to each other with one LAN cable. The script gets two MACs as command line parameter. An Ethernet packet will be created and sent in unicast from one interface to another and vice versa.

The first objective was to determine a network interface corresponding to the given MAC address. This could be solved OS independent with netifaces package.  Some hacks were needed to get this packaged installed, namely it had to be compiled. I solved this by using MinGW. Visual Studio 2008 can be used too. So finding interfaces looks like this:

def get_eth_interface(mac):
    for iface in netifaces.interfaces():
        a = netifaces.ifaddresses(iface)
        iface_addr = a[netifaces.AF_LINK][0]['addr']
        if(mac.lower() == iface_addr):
            return iface

return "none"

The second and most painful objective was RAW_SOCK and Ethernet packets. In Linux it is not a problem: one can use built-in socket objects:

s = socket.socket(socket.AF_INET, socket.SOCK_RAW)
s.bind((src_iface,ethernet.ETH_TYPE_ARP))

But Windows itself has only very limited raw socket support. After long searching I found some posts suggesting using pypcap (an interface to WinPcap). The installation was a little bit tricky because there was no installer for Python 2.7 and later, so I had to check out the latest version from project’s SVN repo and compile it myself. After that is was rather easy to implement packet sending/receiving.

There is one useful package that simplifies Ethernet packet creation:  dpkt. Creating some simple Ethernet packet looks like this:

def build_packet(src_mac, dest_mac):
    packet = ethernet.Ethernet()
    packet.src = eth_aton(src_mac)
    packet.dst = eth_aton(dest_mac)
    packet.data = (TEST_DATA)
    packet.type = ethernet.ETH_TYPE_ARP

return packet

And the last but not least was creating an executable for Windows. It was necessary because of the installation problems described above. I found a very actively developed project PyInstaller. With this you can create one executable file containing all needed libraries. Unfortunately it still cannot handle egg folders properly, so I had to tweak netifaces package to be included into the final executable.

And one more hack concerning creating Windows executable: always use sys.exit() and not simply exit(), because the executable will complain not finding such a function.

Finally I ended up with rather simple and OS independent script for LAN testing and some silver hair 😉

Posted by: deepcani | May 17, 2011

Check if IP is within range specified in CIDR in Java

Recently I had to deal with CIDR notation. I simply needed to check if a particular IP is within the range specified by CIDR.

Here is an example, given IP range specified as 157.166.224.26/10, check if 157.166.21.21 is within this range. It seems that for .NET and C++/C folks the CIDR and IP range check come with the standard libraries. This is not the case for java, as far as I know. So, here is how I’ve done it in Java, after looking at java source code for IntetAddress, and a similar C implementation.

Let’s see what the range 157.166.224.26/10 really specifies. Here is a handy calculator which I used when playing with CIDR. So, as we can see, 157.166.224.26/10 really means you have to accept IPs from 157.128.0.0 to 157.191.255.255. The range contains 2^(32-10) IP addresses.

// Step 1. Convert IPs into ints (32 bits). 
// E.g. 157.166.224.26 becomes 10011101  10100110  11100000 00011010
int addr = (( 157 << 24 ) & 0xFF000000) 
           | (( 166 << 16 ) & 0xFF0000) 
           | (( 224 << 8 ) & 0xFF00) 
           |  ( 26 & 0xFF);

// Step 2. Get CIDR mask
int mask = (-1) << (32 - 10);

// Step 3. Find lowest IP address
int lowest = addr & mask;

// Step 4. Find highest IP address
int highest = lowest + (~mask);

Now, your IP is in the range if lowest <= IP && IP <= highest.

Hopefully, no bugs here.

Older Posts »

Categories